Reasons to shop Fable England AF
Reasons to shop Fable England AX
-
Free delivery on orders over €50
-
-
Shop now, pay later with Klarna
-
Earn 1 point for every £1 you spend
Reasons to shop Fable England AL
-
Free delivery on orders over €50
-
-
Shop now, pay later with Klarna
-
Earn 1 point for every £1 you spend
Reasons to shop Fable England DZ
Reasons to shop Fable England AD
-
Free delivery on orders over €50
-
-
Shop now, pay later with Klarna
-
Earn 1 point for every £1 you spend
Reasons to shop Fable England AO
Reasons to shop Fable England AI
Reasons to shop Fable England AG
Reasons to shop Fable England AR
Reasons to shop Fable England AW
Reasons to shop Fable England AU
Reasons to shop Fable England AT
-
Free delivery on orders over €50
-
-
Shop now, pay later with Klarna
-
Earn 1 point for every £1 you spend
Reasons to shop Fable England AZ
Reasons to shop Fable England BS
Reasons to shop Fable England BH
Reasons to shop Fable England BD
Reasons to shop Fable England BB
Reasons to shop Fable England BE
-
Free delivery on orders over €50
-
-
Shop now, pay later with Klarna
-
Earn 1 point for every £1 you spend
Reasons to shop Fable England BZ
Reasons to shop Fable England BJ
Reasons to shop Fable England BM
Reasons to shop Fable England BT
Reasons to shop Fable England BO
Reasons to shop Fable England BA
-
Free delivery on orders over €50
-
-
Shop now, pay later with Klarna
-
Earn 1 point for every £1 you spend
Reasons to shop Fable England BW
Reasons to shop Fable England BR
Reasons to shop Fable England IO
Reasons to shop Fable England VG
Reasons to shop Fable England BN
Reasons to shop Fable England BG
-
Free delivery on orders over €50
-
-
Shop now, pay later with Klarna
-
Earn 1 point for every £1 you spend
Reasons to shop Fable England BF
Reasons to shop Fable England BI
Reasons to shop Fable England KH
Reasons to shop Fable England CM
Reasons to shop Fable England CA
Reasons to shop Fable England CV
Reasons to shop Fable England BQ
Reasons to shop Fable England KY
Reasons to shop Fable England CF
Reasons to shop Fable England TD
Reasons to shop Fable England CL
Reasons to shop Fable England CN
Reasons to shop Fable England CX
Reasons to shop Fable England CC
Reasons to shop Fable England CO
Reasons to shop Fable England KM
Reasons to shop Fable England CG
Reasons to shop Fable England CD
Reasons to shop Fable England CK
Reasons to shop Fable England CR
Reasons to shop Fable England CI
Reasons to shop Fable England HR
-
Free delivery on orders over €50
-
-
Shop now, pay later with Klarna
-
Earn 1 point for every £1 you spend
Reasons to shop Fable England CW
Reasons to shop Fable England CY
-
Free delivery on orders over €50
-
-
Shop now, pay later with Klarna
-
Earn 1 point for every £1 you spend
Reasons to shop Fable England CZ
-
Free delivery on orders over €50
-
-
Shop now, pay later with Klarna
-
Earn 1 point for every £1 you spend
Reasons to shop Fable England DK
-
Free delivery on orders over €50
-
-
Shop now, pay later with Klarna
-
Earn 1 point for every £1 you spend
Reasons to shop Fable England DJ
Reasons to shop Fable England DM
Reasons to shop Fable England DO
Reasons to shop Fable England EC
Reasons to shop Fable England EG
Reasons to shop Fable England SV
Reasons to shop Fable England GQ
Reasons to shop Fable England ER
Reasons to shop Fable England EE
-
Free delivery on orders over €50
-
-
Shop now, pay later with Klarna
-
Earn 1 point for every £1 you spend
Reasons to shop Fable England SZ
Reasons to shop Fable England ET
Reasons to shop Fable England FK
Reasons to shop Fable England FO
-
Free delivery on orders over €50
-
-
Shop now, pay later with Klarna
-
Earn 1 point for every £1 you spend
Reasons to shop Fable England FJ
Reasons to shop Fable England FI
-
Free delivery on orders over €50
-
-
Shop now, pay later with Klarna
-
Earn 1 point for every £1 you spend
Reasons to shop Fable England FR
-
Free delivery on orders over €50
-
-
Shop now, pay later with Klarna
-
Earn 1 point for every £1 you spend
Reasons to shop Fable England GF
Reasons to shop Fable England PF
Reasons to shop Fable England TF
Reasons to shop Fable England GA
Reasons to shop Fable England GM
Reasons to shop Fable England DE
-
Free delivery on orders over €50
-
-
Shop now, pay later with Klarna
-
Earn 1 point for every £1 you spend
Reasons to shop Fable England GH
Reasons to shop Fable England GI
Reasons to shop Fable England GR
-
Free delivery on orders over €50
-
-
Shop now, pay later with Klarna
-
Earn 1 point for every £1 you spend
Reasons to shop Fable England GD
Reasons to shop Fable England GT
Reasons to shop Fable England GG
Reasons to shop Fable England GN
Reasons to shop Fable England GW
Reasons to shop Fable England GY
Reasons to shop Fable England HT
Reasons to shop Fable England HN
Reasons to shop Fable England HK
Reasons to shop Fable England HU
-
Free delivery on orders over €50
-
-
Shop now, pay later with Klarna
-
Earn 1 point for every £1 you spend
Reasons to shop Fable England IS
Reasons to shop Fable England IN
Reasons to shop Fable England ID
Reasons to shop Fable England IE
-
Free delivery on orders over €50
-
-
Shop now, pay later with Klarna
-
Earn 1 point for every £1 you spend
Reasons to shop Fable England IM
-
Free delivery on orders over €50
-
-
Shop now, pay later with Klarna
-
Earn 1 point for every £1 you spend
Reasons to shop Fable England IL
Reasons to shop Fable England IT
-
Free delivery on orders over €50
-
-
Shop now, pay later with Klarna
-
Earn 1 point for every £1 you spend
Reasons to shop Fable England JM
Reasons to shop Fable England JP
Reasons to shop Fable England JE
Reasons to shop Fable England JO
Reasons to shop Fable England KZ
Reasons to shop Fable England KE
Reasons to shop Fable England KI
Reasons to shop Fable England XK
-
Free delivery on orders over €50
-
-
Shop now, pay later with Klarna
-
Earn 1 point for every £1 you spend
Reasons to shop Fable England KW
Reasons to shop Fable England KG
Reasons to shop Fable England LA
Reasons to shop Fable England LV
-
Free delivery on orders over €50
-
-
Shop now, pay later with Klarna
-
Earn 1 point for every £1 you spend
Reasons to shop Fable England LB
Reasons to shop Fable England LS
Reasons to shop Fable England LR
Reasons to shop Fable England LY
Reasons to shop Fable England LI
-
Free delivery on orders over €50
-
-
Shop now, pay later with Klarna
-
Earn 1 point for every £1 you spend
Reasons to shop Fable England LT
-
Free delivery on orders over €50
-
-
Shop now, pay later with Klarna
-
Earn 1 point for every £1 you spend
Reasons to shop Fable England LU
-
Free delivery on orders over €50
-
-
Shop now, pay later with Klarna
-
Earn 1 point for every £1 you spend
Reasons to shop Fable England MO
Reasons to shop Fable England MG
Reasons to shop Fable England MW
Reasons to shop Fable England MY
Reasons to shop Fable England MV
Reasons to shop Fable England ML
Reasons to shop Fable England MT
-
Free delivery on orders over €50
-
-
Shop now, pay later with Klarna
-
Earn 1 point for every £1 you spend
Reasons to shop Fable England MQ
Reasons to shop Fable England MR
Reasons to shop Fable England MU
Reasons to shop Fable England MX
Reasons to shop Fable England MD
-
Free delivery on orders over €50
-
-
Shop now, pay later with Klarna
-
Earn 1 point for every £1 you spend
Reasons to shop Fable England MC
Reasons to shop Fable England MN
Reasons to shop Fable England ME
-
Free delivery on orders over €50
-
-
Shop now, pay later with Klarna
-
Earn 1 point for every £1 you spend
Reasons to shop Fable England MS
Reasons to shop Fable England MA
Reasons to shop Fable England MZ
Reasons to shop Fable England MM
Reasons to shop Fable England NA
Reasons to shop Fable England NR
Reasons to shop Fable England NP
Reasons to shop Fable England NL
-
Free delivery on orders over €50
-
-
Shop now, pay later with Klarna
-
Earn 1 point for every £1 you spend
Reasons to shop Fable England AN
Reasons to shop Fable England NC
Reasons to shop Fable England NZ
Reasons to shop Fable England NI
Reasons to shop Fable England NE
Reasons to shop Fable England NG
Reasons to shop Fable England NU
Reasons to shop Fable England NF
Reasons to shop Fable England MK
-
Free delivery on orders over €50
-
-
Shop now, pay later with Klarna
-
Earn 1 point for every £1 you spend
Reasons to shop Fable England NO
Reasons to shop Fable England OM
Reasons to shop Fable England PK
Reasons to shop Fable England PS
Reasons to shop Fable England PA
Reasons to shop Fable England PG
Reasons to shop Fable England PY
Reasons to shop Fable England PE
Reasons to shop Fable England PH
Reasons to shop Fable England PN
Reasons to shop Fable England PL
-
Free delivery on orders over €50
-
-
Shop now, pay later with Klarna
-
Earn 1 point for every £1 you spend
Reasons to shop Fable England PT
-
Free delivery on orders over €50
-
-
Shop now, pay later with Klarna
-
Earn 1 point for every £1 you spend
Reasons to shop Fable England QA
Reasons to shop Fable England RU
-
Free delivery on orders over €50
-
-
Shop now, pay later with Klarna
-
Earn 1 point for every £1 you spend
Reasons to shop Fable England RW
Reasons to shop Fable England WS
Reasons to shop Fable England SM
-
Free delivery on orders over €50
-
-
Shop now, pay later with Klarna
-
Earn 1 point for every £1 you spend
Reasons to shop Fable England ST
Reasons to shop Fable England SA
Reasons to shop Fable England SN
Reasons to shop Fable England RS
-
Free delivery on orders over €50
-
-
Shop now, pay later with Klarna
-
Earn 1 point for every £1 you spend
Reasons to shop Fable England SC
Reasons to shop Fable England SL
Reasons to shop Fable England SG
Reasons to shop Fable England SX
Reasons to shop Fable England SK
-
Free delivery on orders over €50
-
-
Shop now, pay later with Klarna
-
Earn 1 point for every £1 you spend
Reasons to shop Fable England SI
-
Free delivery on orders over €50
-
-
Shop now, pay later with Klarna
-
Earn 1 point for every £1 you spend
Reasons to shop Fable England SB
Reasons to shop Fable England SO
Reasons to shop Fable England ZA
Reasons to shop Fable England GS
Reasons to shop Fable England KR
Reasons to shop Fable England SS
Reasons to shop Fable England ES
-
Free delivery on orders over €50
-
Shop now, pay later with Klarna
-
Earn 1 point for every £1 you spend
-
Reasons to shop Fable England LK
Reasons to shop Fable England BL
Reasons to shop Fable England SH
Reasons to shop Fable England KN
Reasons to shop Fable England LC
Reasons to shop Fable England MF
Reasons to shop Fable England PM
Reasons to shop Fable England VC
Reasons to shop Fable England SD
Reasons to shop Fable England SR
Reasons to shop Fable England SJ
-
Free delivery on orders over €50
-
-
Shop now, pay later with Klarna
-
Earn 1 point for every £1 you spend
Reasons to shop Fable England SE
-
Free delivery on orders over €50
-
-
Shop now, pay later with Klarna
-
Earn 1 point for every £1 you spend
Reasons to shop Fable England CH
Reasons to shop Fable England TW
Reasons to shop Fable England TJ
Reasons to shop Fable England TZ
Reasons to shop Fable England TH
Reasons to shop Fable England TL
Reasons to shop Fable England TG
Reasons to shop Fable England TK
Reasons to shop Fable England TO
Reasons to shop Fable England TT
Reasons to shop Fable England TN
Reasons to shop Fable England TR
Reasons to shop Fable England TM
Reasons to shop Fable England TC
Reasons to shop Fable England TV
Reasons to shop Fable England UM
Reasons to shop Fable England UG
Reasons to shop Fable England AE
Reasons to shop Fable England GB
Reasons to shop Fable England US
Reasons to shop Fable England UY
Reasons to shop Fable England UZ
Reasons to shop Fable England VU
Reasons to shop Fable England VA
-
Free delivery on orders over €50
-
-
Shop now, pay later with Klarna
-
Earn 1 point for every £1 you spend
Reasons to shop Fable England VE
Reasons to shop Fable England VN
Reasons to shop Fable England WF
Reasons to shop Fable England EH
Reasons to shop Fable England YE
Reasons to shop Fable England ZM
Reasons to shop Fable England ZW


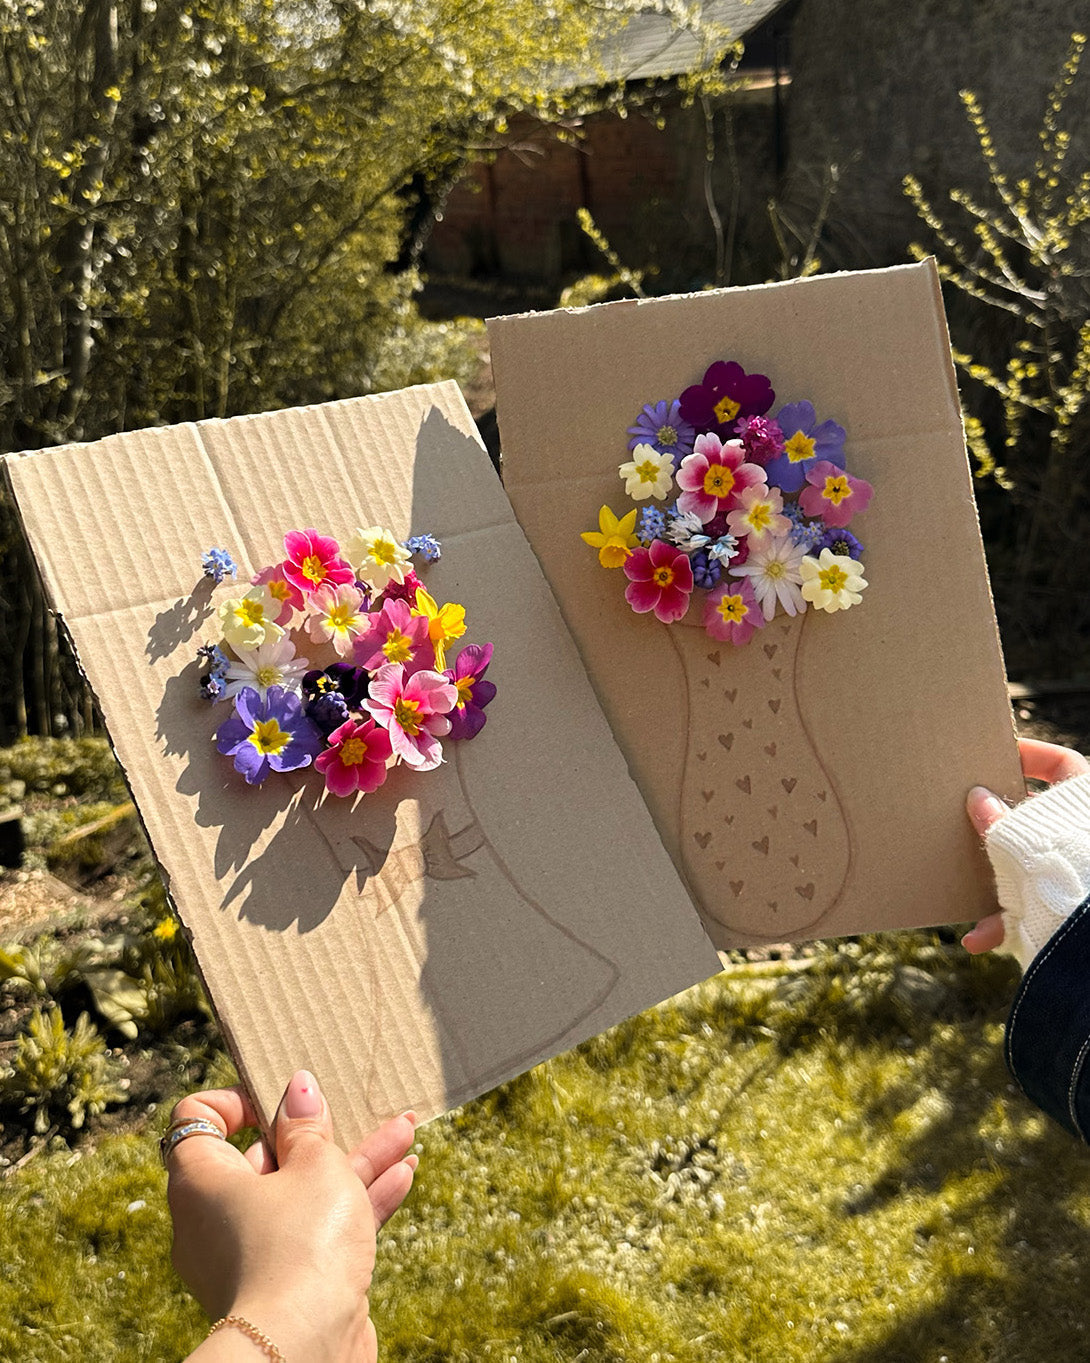
 The final steps should look something like this...

